
Installing the Virtual Machine Manager (VMM) Console on Windows 8.1 and Connecting to a VMM Management Server Using the VMM Console
In this article, you will install Virtual Machine Manager (VMM) console on Windows 8.1 workstation for managing VMM Management server. In VMware, VMware vSphere Client is used in this scenario. But in VMM, the workstation on which you install the VMM console must be a member of an Active Directory Domain. To setup this process, log on user should be local Administrators group on the computer. In my lab environment, I am using domain administrators’ account, which is not recommended in production environment.
System Requirements: VMM Console
Hardware Requirements:
Managing up to 150 hosts
| Hardware components | Minimum |
| Processor | Pentium 4, 1 gigahertz (GHz) or greater |
| RAM | 2 GB |
Supported Client Operating Systems:
| Operating System for VMM in System Center 2012 R2 | Edition | System Architecture |
| Windows 7 with Service Pack 1 | Professional , Enterprise, and Ultimate | X86 and x64 |
| Windows 8 | Professional and Enterprise | 32-bit and 64-bit |
| Windows 8.1 | Professional and Enterprise | 32-bit and 64-bit |
To install the VMM Console and Connect to a VMM Management Server:
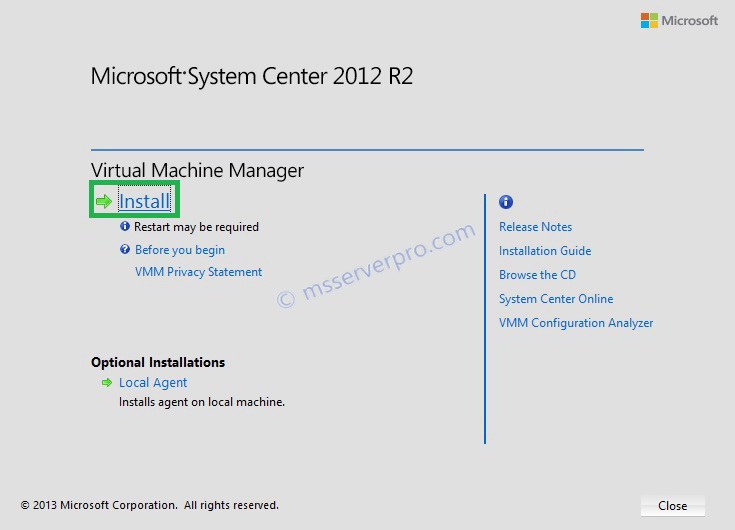
- To start setup VMM Console, on your installation media, double-click on setup.exe on the installation setup files. On the Virtual Machine Manager Install page, click Install.
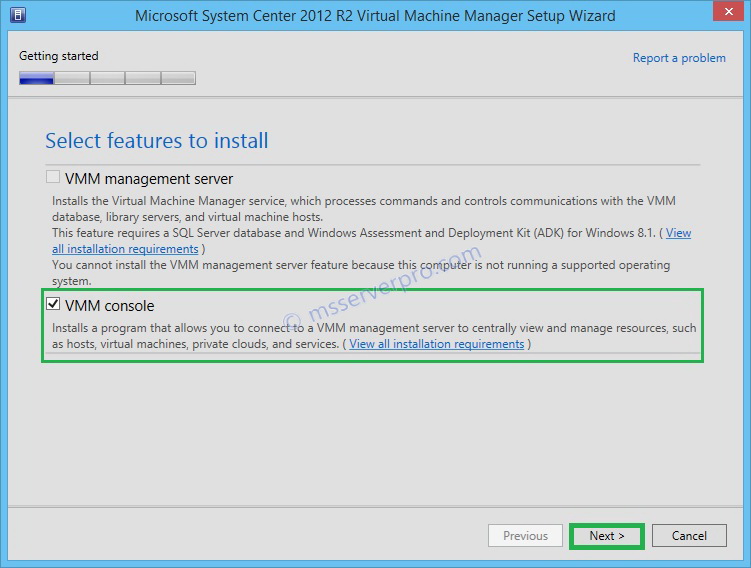
- On the Select features to install page, select the VMM console check box, and then click Next.
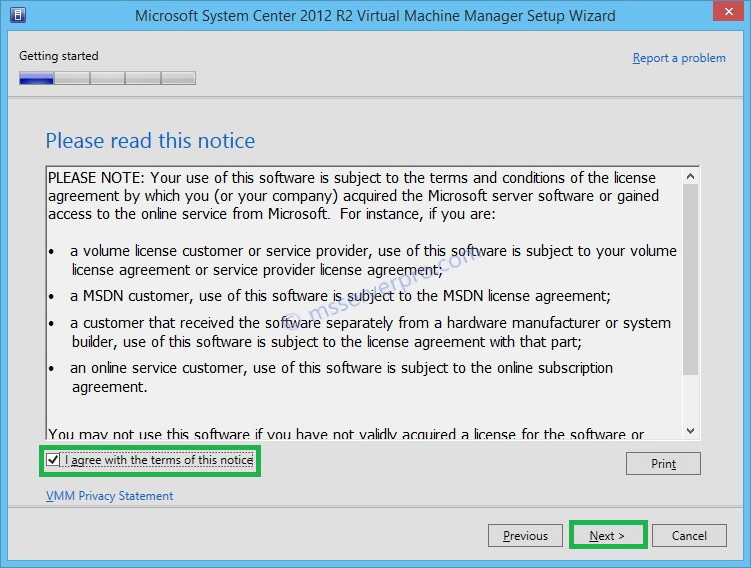
- On the Please read this notice page, click I agree with the terms of this notice, and then click Next.
- On the Customer Experience Improvement Program (CEIP) page, click Next.

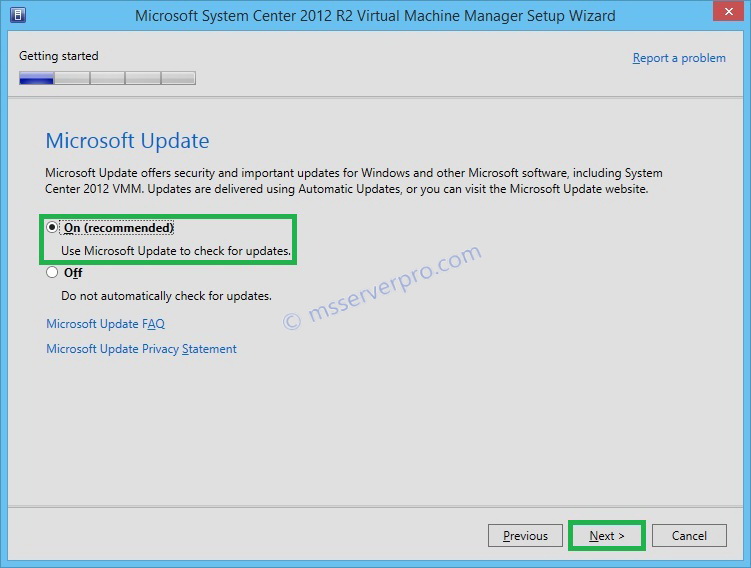
- On the Microsoft Update page, select On (recommended) and then click Next.
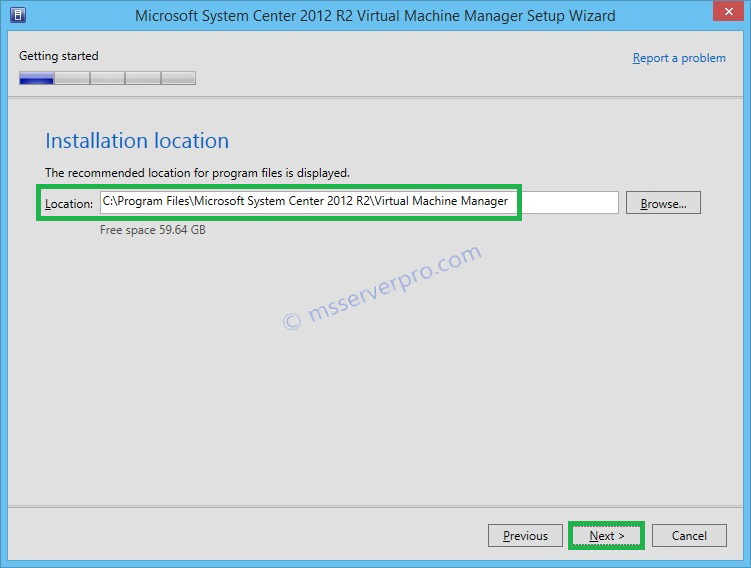
- On the Installation location page, use the default location path and click Next.
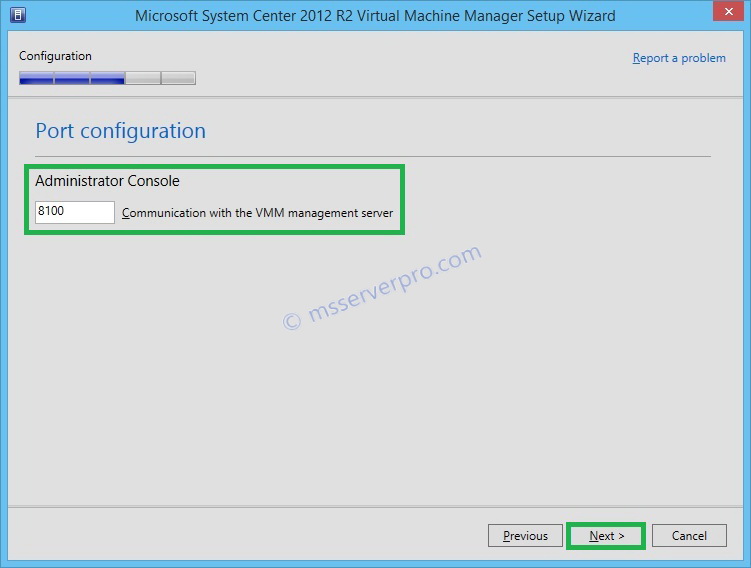
- On Port configuration page, accept the default administrator console port and click Next.
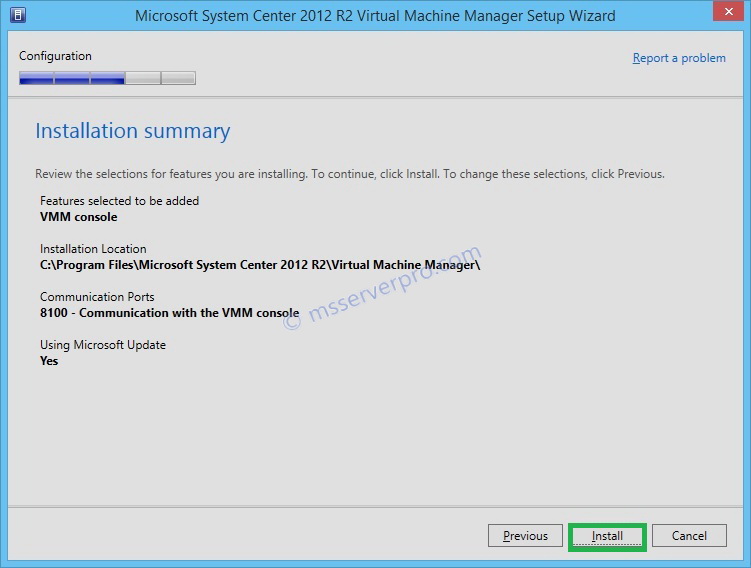
- On the Installation summary page, review the selections for features you are installing, and then click Install.
- On the Installing features page appears and displays the installation progress.

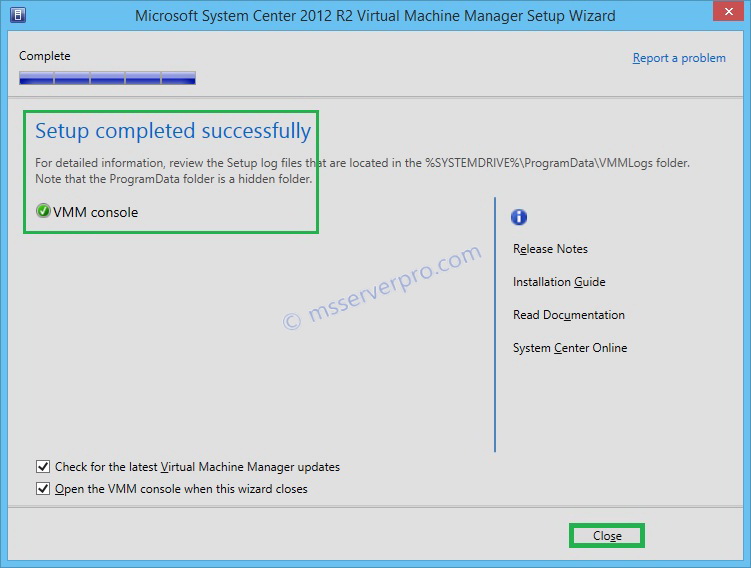
- On the Setup completed successfully page, click Close to finish the installation.
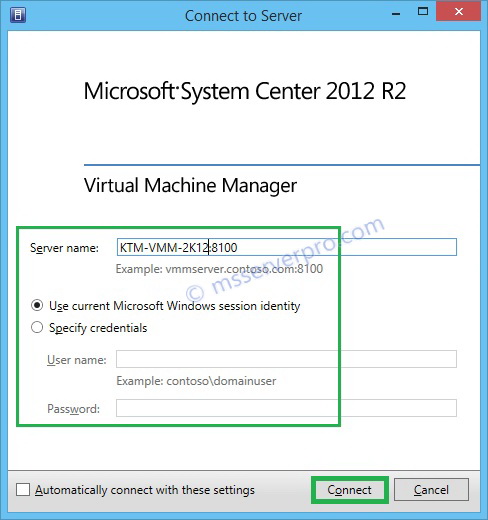
- On the Desktop, double-click the Virtual Manager Console icon. In the Connect to Server dialog box, do the following as figure. Here, KTM-VMM-2K12 is our VMM Server.

Summary:
I hope this article will be more helpful during the installation of the Virtual Machine Manager (VMM) console on Windows 8.1 workstation.
server virtualization, virtualization software, virtualisation, virtual machines, cheap virtual web hosting, desktop virtualization, virtual infrastructure, server consolidation, storage virtualization, virtualization management, application virtualization, disaster recovery, virtualisation services, virtual server, data center, server virtualisation, virtualization storage, virtualization server, vm ware, virtualization applications


